I raised the bar with the creation of Mainline Viaduct. The viaduct first appeared in Season 1, Episode 1, and the improved version first aired with my remakes in "Better Late Than Never."
In the following paragraphs, I will strive to give you a glimpse of how I created this venue and how you can create one of your own under $15.
Supplies:
- pencil
- scissors
- circular saw
- 1/8'' plywood or siding board
- 1" by 1" wood
- screws/nails
- 1/2" by 4" pine board
- gray paper (or whatever color you want the viaduct to be)
- green tablecloth
- blue paper
- plastic wrap
- Spanish moss or other forage scenics (optional)
- rocks (optional)
- black spray paint (optional)
- ruler
Step 1:
*All measurements are according to what I made, however, the viaduct can be made bigger by simply cutting larger pieces of plywood.
b. Cut a rectangle of plywood, 24" by 30". *
c. Cut the 1/2" by 4" board to about 26."*
d. Cut the 1" by 1" piece to make four pieces at least 16" long each, but no longer than 24".
e. Assemble. (Refer to Figure 1 and Figure 2.)
 |
| Figure 1 |
 |
| Figure 2 |
 a. Cut about 12 - 1 1/2" strips of 12'' paper.
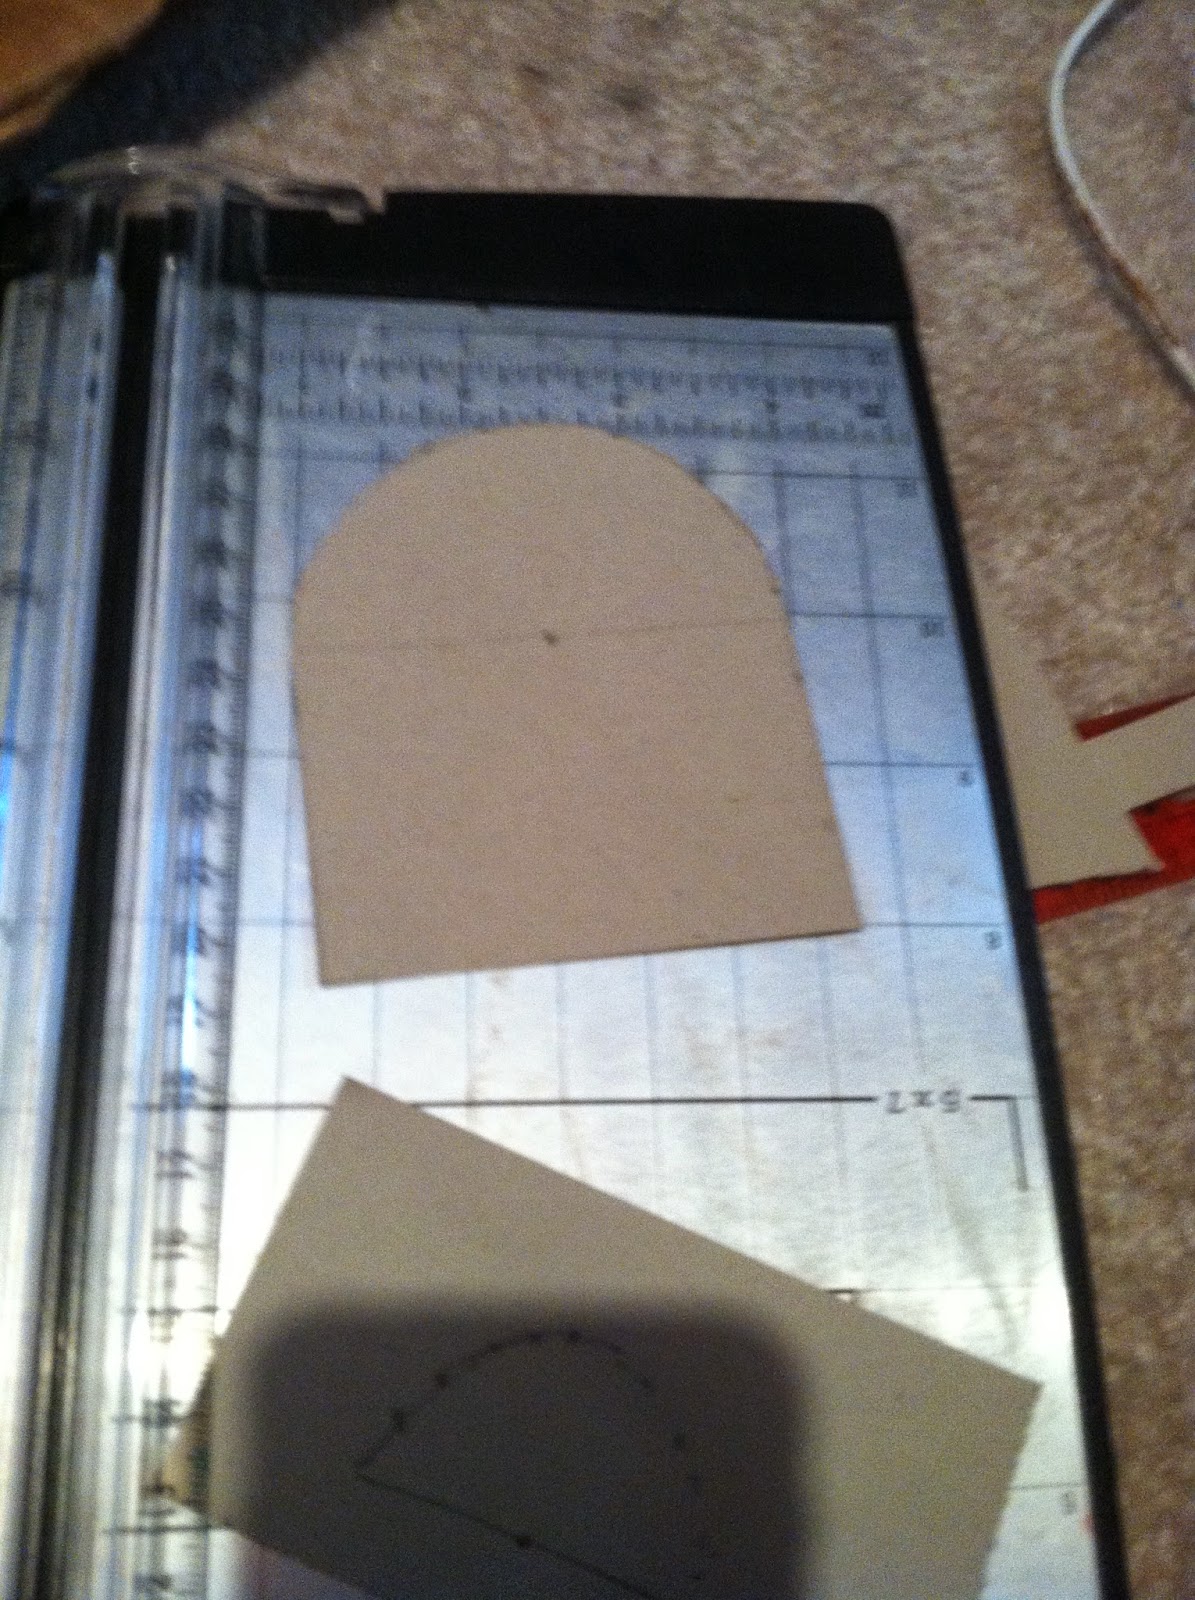 b. Cut out 12 arches, each one and a half inches in radius. Make sure that above the cutout arch there is about 2-3 inches to spare.
c. Glue them all together. This should form two sets of two-dimensional viaducts.
 d. Using scrap paper and more of that same gray, make several 4.25" strips.
e. Hot glue the 4.25" strips into around the viaduct arches. Then, as hard as it will be, you must glue the other side accordingly. I would recommend gluing the straight sides in fist and then putting the curved arch strips on.
Doing Processes D and E make the viaduct strong and three-dimensional. See Figure 3.
 |
| Figure 3 |
Step 3:
a. Slide the rigid viaduct under and then up into position under the board. Add two sets of rails to the top of the board.
b. Add tablecloths or other mass greenery items as such, and secure around the viaduct. (Figure 4.)
 |
| Figure 4 |
c. Add dark blue or blue paper underneath the viaduct but on top of the greenery for water.
 |
| (I actually didn't have my greenery in the viaduct yet in this picture.) |
d. Unless you want to make yours waterproof, artificial water can inexpensively be made with ceran wrap, or also known as plastic wrap. Gravel and rocks can act for two things. They can make the realism come alive, and they can provide a great "transition strip."

e. Add Spanish moss and scenics!

 |
| (I used the Krylon "Chocolate" color. [Top left.] ) Figure 5. |
 |
| (All of the dark spots are where the spray spritzed it. Weathering looks really impressive especially in the videos.) Figure 6. |
g. Pose an engine to see the great scene you created!

Note: Usually regular plastic totes can be used on either side to continue the track, or, you can suspend the viaduct between two train tables, which also gives it that "bridging" effect.
Feel free to email me with any questions!!!
Mr. Larrison: larrisons1234@gmail.com
No comments:
Post a Comment